In order for you to see content playing on your screens you will need to attach a Media player. Currently only approved Android hardware are supported.
We are going to cover the Android player below and show you how to add this to your account. Please note, you must have the digitalsignage.NET Core player software installed on your media player before following these steps.
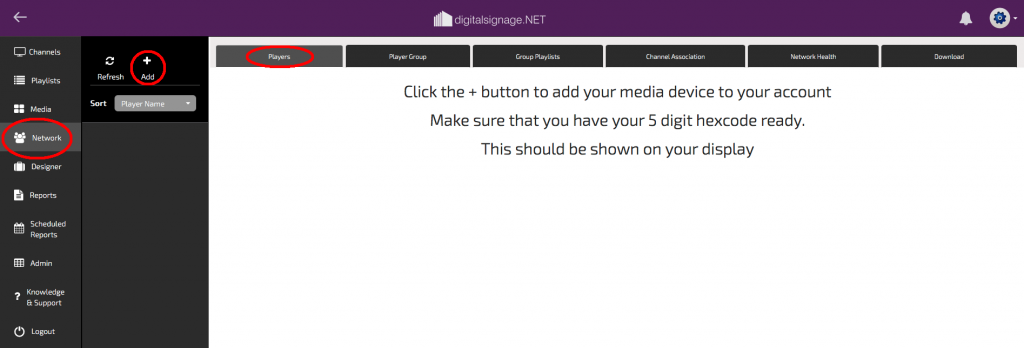
1. Login to your account. Select Network from the menu, Players tab and click the + button to add a player. .
2. Player type is automatically set to ‘Android Player’. If not then select it from the dropdown menu.
3. Add an image of the player location or the player itself if required by clicking. The default image is the Android logo.
3. Give your player a relevant name.
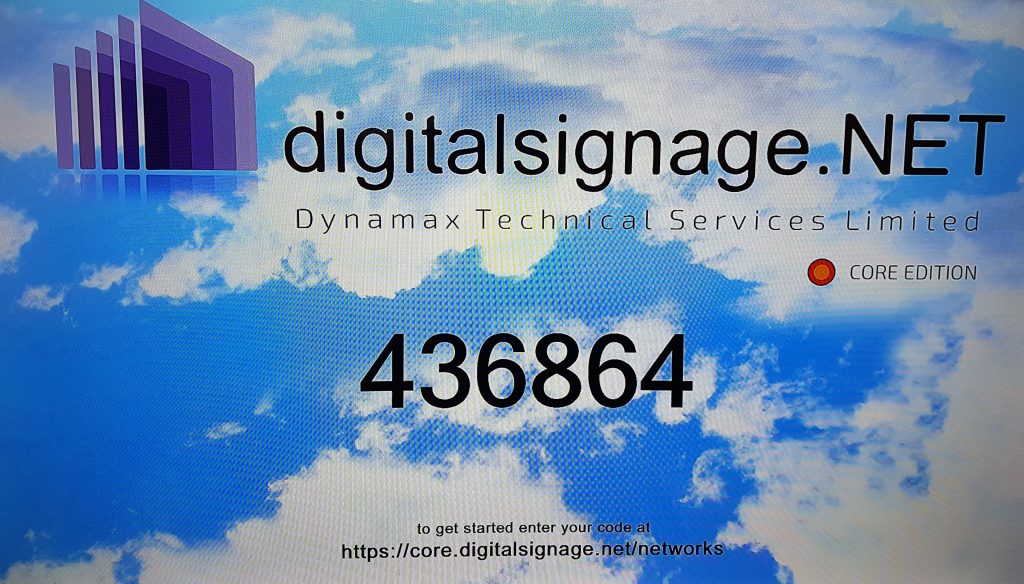
4. Type in the Hexcode. You should have something similar on your screen to the image below, after installing the digitalsignage.NET Core Edition player software on your Android media player device.
5. Set a connection interval. This is the time interval between connections from the media player to the cloud server. The default setting is 1 minute. If you are connected via a 3G/4G network you may wish to increase this time interval to save data charges.
6. Select the appropriate time zone. This is important so that the player is in your own timezone.
7. Select the Channel that you wish your player to be associated with. For test purposes select the ‘Default channel’.
8. Player Group can be left blank at present. This is an advanced feature.
9. Make the player live (active) or inactive by ticking or un-ticking the box. Default is active.
10. Set a suitable reboot time. Usually this is set to a time which is outside of the normal display time period. Please note: a rooted device is required for the reboot time to work otherwise an app such as ‘FastRebootPro’ can be used to reboot the device. You can find the app at:
https://play.google.com/store/apps/details?id=com.greatbytes.fastrebootpro&hl=en
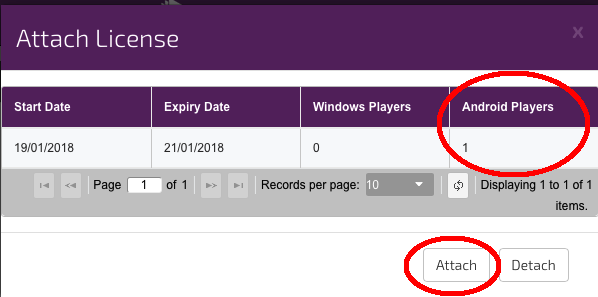
11. Add your Player License by clicking on button, this will open the License window. Select the appropriate license and click attach. (if no licences are visible you will need to purchase a subscription)
12. If you want to receive an email if the player has any errors, such as going offline, tick the checkbox and enter an email address, multiple email address can also be added.
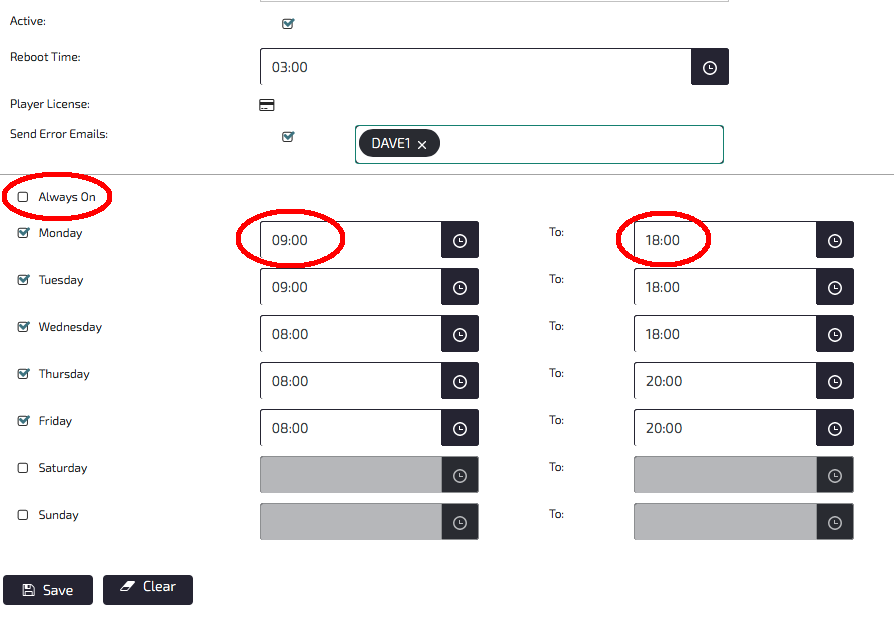
13. By default the player is set to “Always on “ and will play content for 24 hours. If you want to set Uptimes (On- Off times) un-tick the checkbox and enter the required times. The player will then stop and start playback outside of these times. If playback is not required for a particular day then simply un-tick that day.
Now all the details have been entered click Save and the player will be added to the Network list.


